|
[Front Page] [Features] [Departments] [SGAP Home Page] [Subscribe]

Getting Started 6: Planting Out
Based on a series of short article aimed at the new grower of Australian native plants. The original series was written by the late Arthur Cooper and appeared in the newsletter "Native Plants for New South Wales" in the early 1970s. It was subsequently updated and reprinted in the same newsletter in 1990-91.
This is a great event in your plants life, so take it seriously.
The best time for planting is undoubtedly autumn. During this period there is still warmth in the soil and the plant will have 8 or 9 months to become established before the following summer. You can successfully plant out at other times but if you're going to plant in spring or summer you will have to take special precautions to ensure that sufficient water is provided during hot spells. It only takes one hot, windy day to kill or seriously damage a young plant in dry soil.
The plant should be healthy and properly hardened-off. A plant from a respectable nursery will be in this state. Don't leave it lying around; that will do more harm than good.
The soil must be wet, preferably after a week of heavy rain. If nature won't oblige, you must wet the ground. Make a hole (as described below), fill it with water and let it soak away. If there's still water in the hole after 10 minutes, the drainage isn't ideal and you will have to either take action to improve the drainage or use only plants that are tolerant of such conditions.
Take your plant in its pot (or plastic bag) and, using it as a guide, make a hole a little deeper than the pot and about twice as wide. In the bottom of the hole put some peat moss mixed with some soil and a sprinkle of slow-release fertiliser; perhaps a bit extra for greedy feeders like hibiscus and less for fussy species like waratahs and banksias.
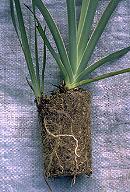 
Loosen the plant from the pot by tapping the sides and bottom, slide the ball of earth out on to a support (such as a trowel) and then slide it down into the hole. Once you have a bit of experience you can upend the pot, tap the plant out into your hand and carefully lower it into the hole. Try not to grip the ball of earth and make it crumble; things are easier if you've watered the pot beforehand, just enough to make the soil hold together. Pour loose soil around the plant and firm it down with the fingers. Don't get any on top; the "wind and water line" must be the same in the ground as in the pot.
Even though you've tried to keep the roots from harm, they'll have been disturbed and they won't be able to take up water as they should. So you must keep the plant well watered for a week or so. Keep the soil moist, not soggy.
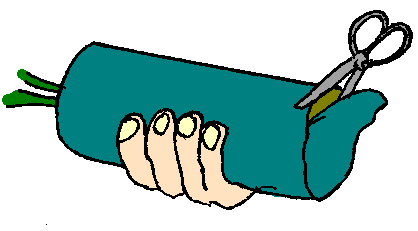
Plants in plastic bags although fairly uncommon these days are still available and need different handling. Some gardeners have ways of getting the bag off in one piece but, until you have their skill its best to cut the bag off. Water the plant and let it drain for an hour or so. Turn it upside down on your hand and cut nearly around the bottom. Holding the bottom in place with your fingers, cut nearly up one side.

Now turn the bag right way up and slide it down into the hole, releasing the bottom of the bag and flipping it aside at the last moment. Pull the bag up away from the rootball; you may have to cut the last bit of the side. Fill up the hole with soil in the same manner as when planting from a pot.
If you've planted in an exposed position, winds can move the plant about and loosen the roots. Put in a stake near the plant at the time of planting (you may damage the roots if you do it later) and tie the plant gently to it. The stakes should be removed once the plant becomes established. It's probably best to use two stakes, one on each side of the plant as shown in the diagram. This allows the plant some movement which will enable it to develop a strong root system but avoids the possibility of the plant becoming dependent on staking.
In areas subject to frost, some protection may need to be given during the first winter, even to species which are frost-hardy when older. A simple method is to put a few stakes around the plant and place a plastic bag over the plant at night. The bag must, however be removed during the day.
Now, sit back and enjoy the growth of your new plant....

[Front Page] [Features] [Departments] [SGAP Home Page] [Subscribe]
Australian Plants online - September 1999
The Society for Growing Australian Plants
|